Graphics Programming - Week 2
Stripping the Engine
This week is when some of the concepts of OpenGL started to click for me. At the end of last week, I almost made it to the end of TheCherno’s OpenGL course, right before the video on rendering multiple objects. I knew at some point I would have to make the switch to the LearnOpenGL course and that became pretty obvious to me this week. Before I left for school this semester, I had printed out the first half of the series in a book so that I could take notes, especially because I’m constantly having to translate between Go and C++.
The first thing I had to do to get started with refactoring for the LearnOpenGL course was to start stripping the engine. The book focuses on just the core of graphics programming, so any extra functionality, like imgui :( , had to go. By the end of the refactor, the code was a lot more flexible and more compatible with the course. I think a lot of what I learned this week was a direct result of refactoring for a different paradigm because the LearnOpenGL course has a fundamentally different approach to the initial rendering process.
Understanding Buffers
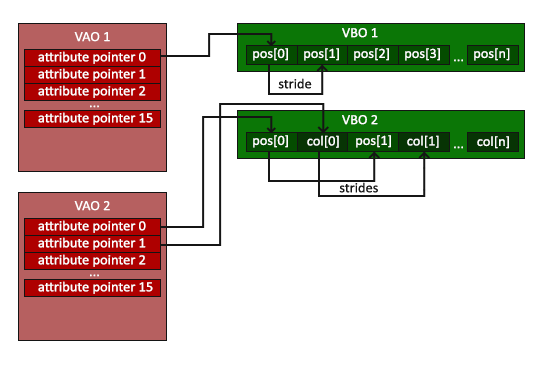
A lot of my confusion around OpenGL before this week had to do with buffers, specifically the difference between VBOs, VAOs, and Index Buffers. To set up the rendering process, you need to define your position byte data (which would normally be an .obj file loaded dynamically) before setting up an index buffer with the indices in the correct order.
positions := []float32{
// positions        texture
  0.5, 0.5, 0.0,    1.0, 1.0, // top right
  0.5, -0.5, 0.0,   1.0, 0.0, // bottom right
  -0.5, -0.5, 0.0,  0.0, 0.0, // bottom left
  -0.5, 0.5, 0.0,   0.0, 1.0, // top left
}
Because this buffer is just an array of byte values, we need to tell OpenGL how to interpret the buffer. This is where things started to click. If you take a look at the VAO below, it’s easy enough to understand that with only one Vec3 uniform for the position, we can simply set a stride value of 3 * sizeof(float32) to compute the stride within the buffer.
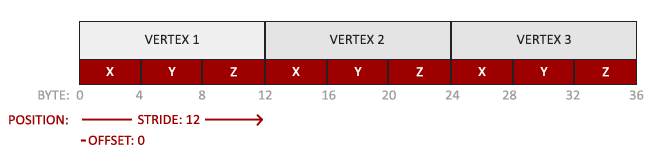
However, when adding the texture coordinates, our stride values change because, within each vertex, the last two bytes now represent the x and y texture coordinates. The tricky part here is to tell OpenGL that each vertex now contains a Vec3 representing the position and a Vec2 that represents the texture coordinates. This is demonstrated below:
Now, with our existing abstraction, we can simply push the size of each vertex attribute within the VAO and our implementation should take care of sending the data to the uniform in the appropriate location:
va := NewVertexArray()
vb := NewVertexBuffer(*positions)

layout := NewVertexBufferLayout()
layout.Pushf(3) // represents the postions
layout.Pushf(2) // represents the texture coords
va.AddBuffer(vb, layout)

ib := NewIndexBuffer(indeces)

shader := NewShader("vertexShader.glsl", "fragmentShader.glsl")
shader.Bind()
shader.SetUniform4f("u_Color", 0.8, 0.3, 0.8, 1.9)

texture := NewTexture("fragment.png")
texture.Bind(0)
shader.SetUniform1i("u_Texture", 0)
Coordinate Systems and Camera
I won’t lie, this is the part I’ve always been a bit nervous about when it comes to building graphics engines. I haven’t taken linear algebra at school yet so there were some core concepts I needed to cover before attempting anything with vectors or matrices. I decided to spend some time watching part of the Linear Algebra course on Khan Academy instead of just diving in with a math library like glm because I figured that knowing the math would save me a ton of time with engine modification in the future.
The goal of implementing a coordinate system in OpenGL is to take the vertex positions as normalized coordinates and eventually map them to the screen in 2D space. What I didn’t realize was how many stages in the pipeline there are to accomplish this as well as how much manual implementation is required. The pipeline looks like this:
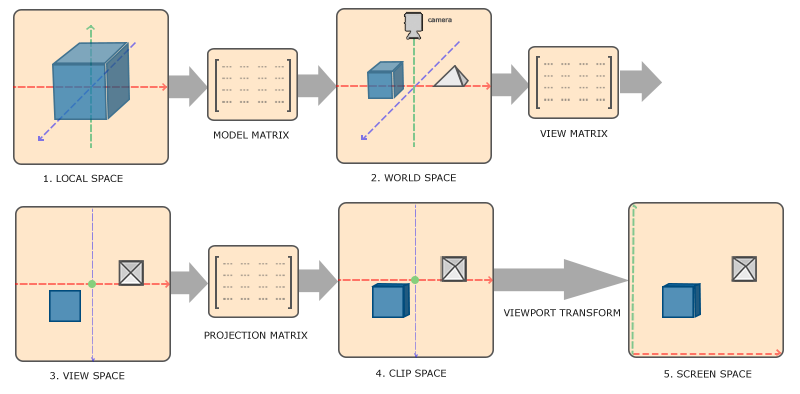
These first basic renders weren’t particularly math-heavy, just some small rotations. One of the first steps was to specify a projection matrix that lets us set the field of view, aspect ratio, and the near and far plane for the scene.
projection := mgl32.Perspective(mgl32.DegToRad(45.0), 960.0 / 540.0, 0.1, 100.0)
The next matrix we need to keep track of is the view matrix to help take us from view space to world space. This is essentially the closest thing to a true “camera” as you’d normally think about it.
view := mgl32.Ident4()
viewTranslation := mgl32.Translate3D(0.0, 0.0, -3.0)
view = view.Mul4(viewTranslation)
Finally, the model matrix lets us specify the positions of the model in world space in relation to our camera:
model := mgl32.Ident4()
modelRotation := mgl32.HomogRotate3D(mgl32.DegToRad(-55.0), mgl32.Vec3{1.0, 0.0, 0.0})
model = model.Mul4(modelRotation)
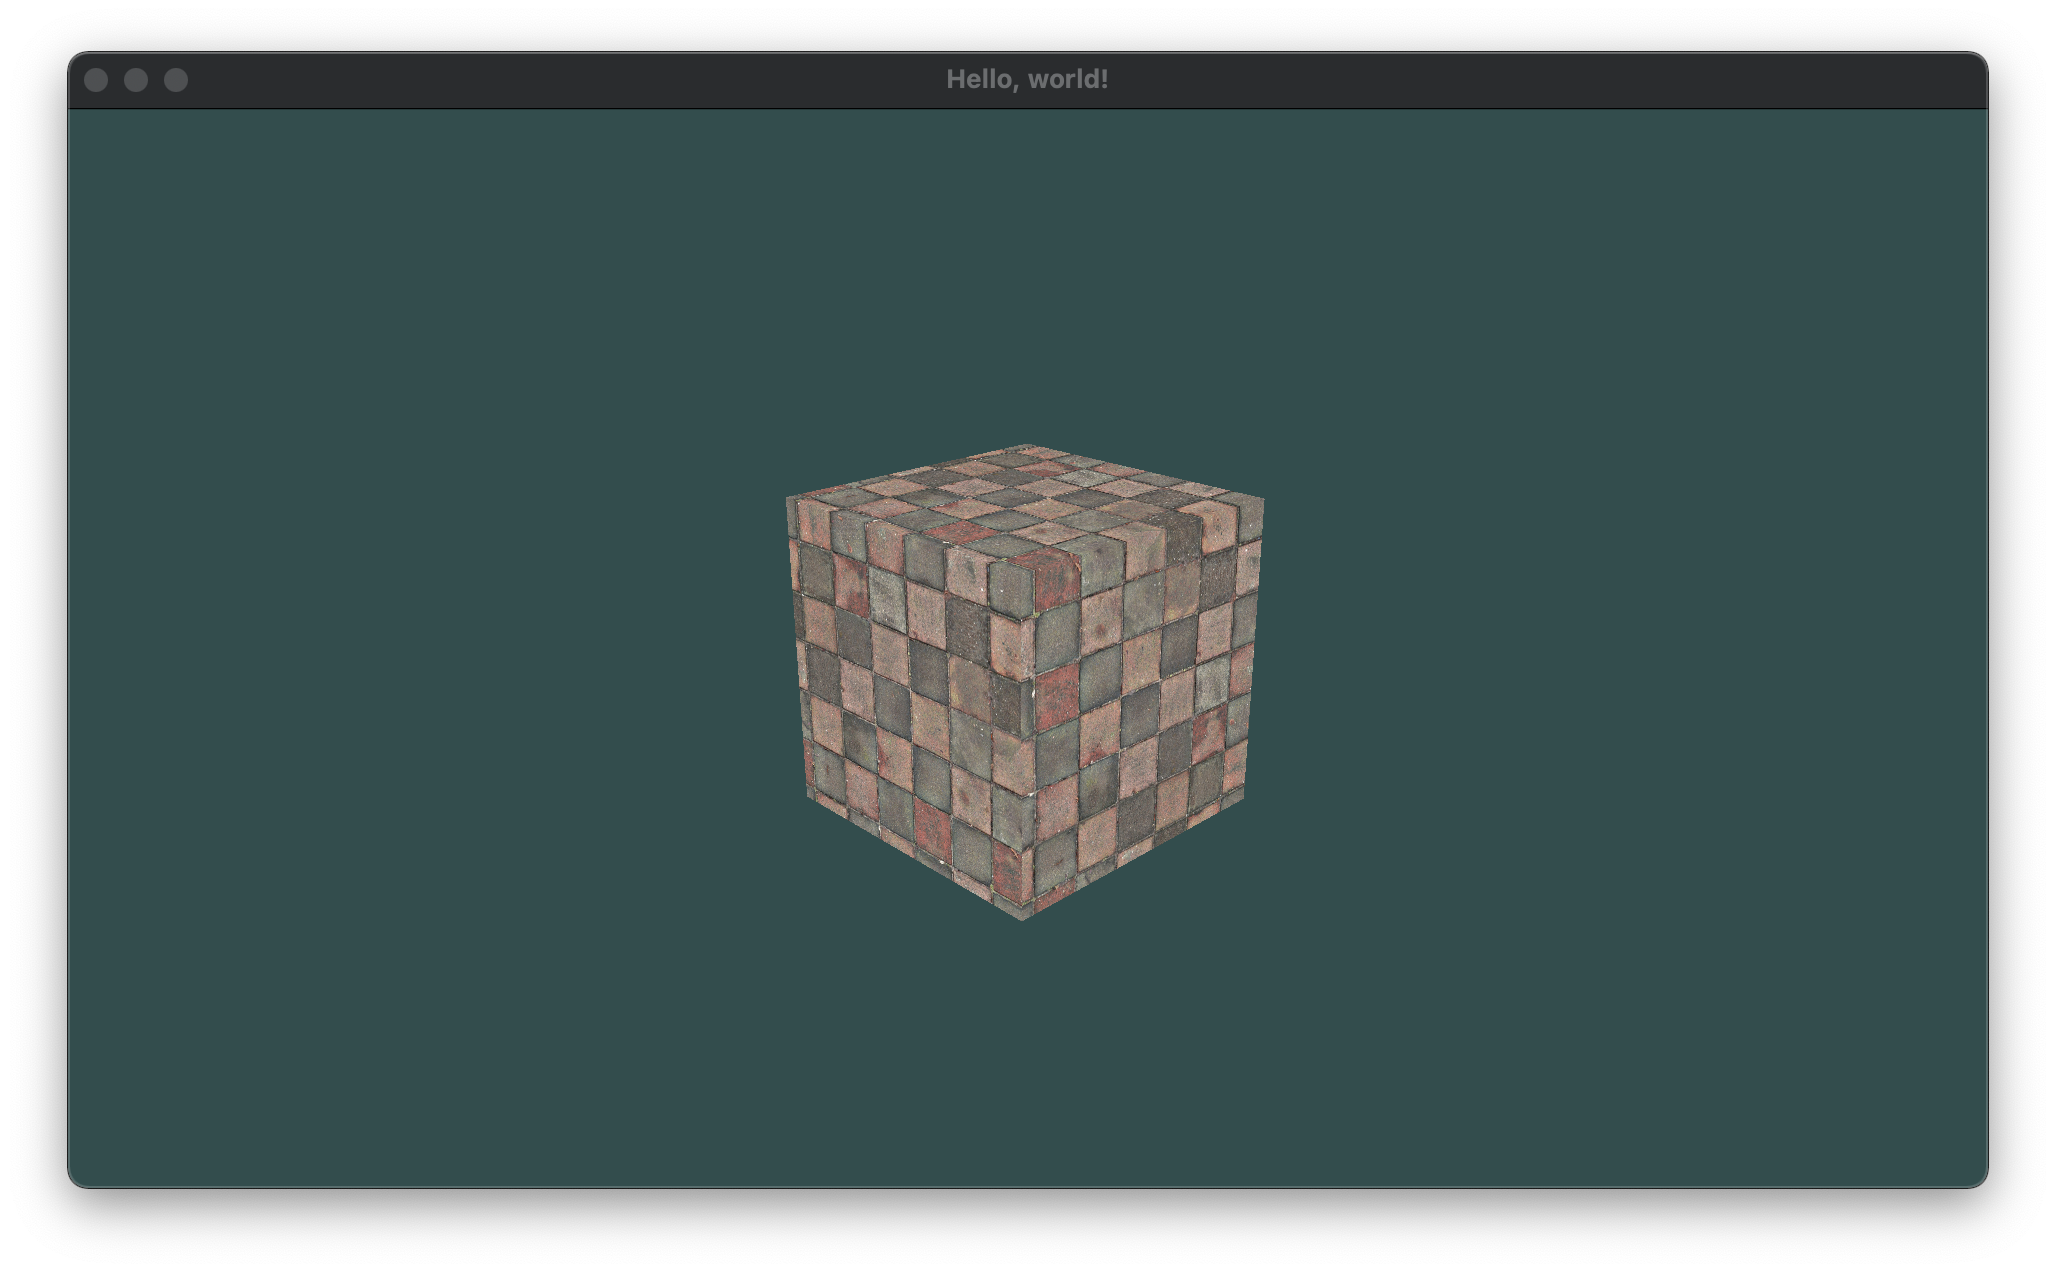
The final result was a 3D plane lying flat against the “floor” in a perspective view. This was the first time I’d done 3D drawing with OpenGL so it was a pretty big milestone for me.
What allows us to both render a rectangle and then actually view it is the fact that each of these matrices gets passed to the vertex shader. This means that the calculations for each vertex can be computed on the GPU rather than the CPU although we do have to set 3 different uniforms. By this stage of the project, my vertex shader looked something like this:
#version 330 core

layout(location = 0) in vec4 position;
layout(location = 1) in vec2 texCoord;

out vec2 v_TexCoord; // gets sent to the fragment shader

uniform mat4 model;
uniform mat4 view;
uniform mat4 projection;

void main()
{
  gl_Position = projection * view * model * position; // screen space position
  v_TexCoord = texCoord;
}
I’m not going to dump a whole bunch of math and vertex code here, but after a lot of trial and error, I was able to start stepping things up a notch. OpenGL makes you do a lot of the heavy lifting at the beginning but once you have a lot of the components abstracted away, you can start to do some really cool things with just translations and rotations:
Camera Movement
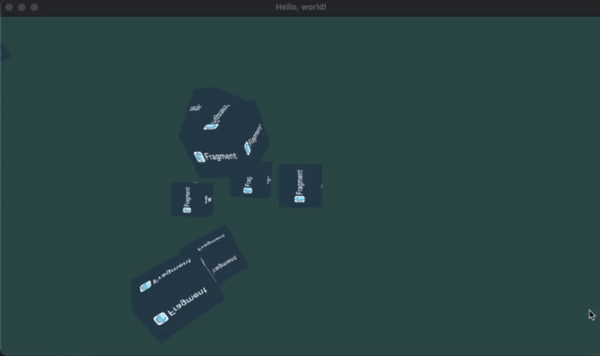
Once I had a static camera, the next step was to implement camera movement. Before I could implement any WASD controls, I needed to get a feel for how the camera “moves” around the scene. Because the concept of a “camera” in OpenGL is abstract, the way we handle movement involves moving the world relative to the camera, not the other way around. To do this, we need to specify a LookAt matrix that we can use to transform the view matrix:
  view := mgl32.Ident4()
  var radius float32 = 10.0
  camX := float32(math.Sin(glfw.GetTime())) * radius
  camZ := float32(math.Cos(glfw.GetTime())) * radius
  cameraLookAt := mgl32.LookAtV(
      mgl32.Vec3{camX, 0.0, camZ},
      mgl32.Vec3{0.0, 0.0, 0.0},
      mgl32.Vec3{0.0, 1.0, 0.0},
      )
  view = view.Mul4(cameraLookAt)
  shader.SetUniformMat4f("view", view)
This ensures that while the world transforms around the camera, the view matrix is always locked onto the object in focus (which is hardcoded for now). This gives us a result like this:
Handling Input
Ok, so now’s the time for WASD and mouse input. go-gl provides us with ways to register callback functions similar to the C++ implementation. Callbacks were also a reason I chose Go over Java initially. I know they can be done in both languages, but coming from Javascript and Typescript, I was just a bit more comfortable using them in Go.
To implement WASD controls, we don’t use callbacks, but we poll for input events at the start of each frame in the render loop. We can then check user input using GLFW. Forward translations are relatively easy because we can add or subtract a translation vector without doing much else. For sideways movement, we need to calculate the cross product of the camera “up” vector by the translation position and then normalize it to between -1.0 and 1.0 before then applying the translation to the correct matrix:
func processInput(window *glfw.Window) {
	var cameraSpeed float32 = 2.5 * deltaTime
	if window.GetKey(glfw.KeyW) == glfw.Press {
		translation := cameraFront.Mul(cameraSpeed)
		cameraPos = cameraPos.Add(translation)
	}
	if window.GetKey(glfw.KeyS) == glfw.Press {
		translation := cameraFront.Mul(cameraSpeed)
		cameraPos = cameraPos.Sub(translation)
	}
	if window.GetKey(glfw.KeyA) == glfw.Press {
		crossProduct := cameraFront.Cross(cameraUp)
		crossProduct = crossProduct.Normalize()
		translation := crossProduct.Mul(cameraSpeed)
		cameraPos = cameraPos.Sub(translation)
	}
	if window.GetKey(glfw.KeyD) == glfw.Press {
		crossProduct := cameraFront.Cross(cameraUp)
		crossProduct = crossProduct.Normalize()
		translation := crossProduct.Mul(cameraSpeed)
		cameraPos = cameraPos.Add(translation)
	}
}
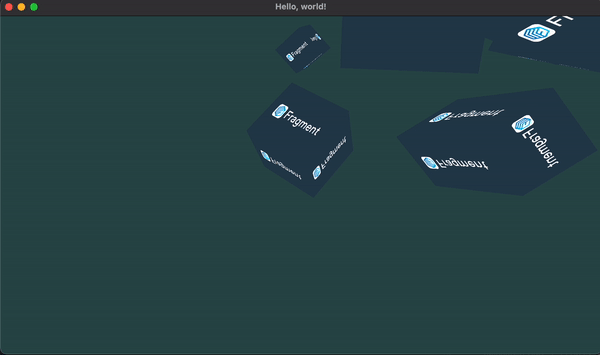
Finally, I had to make sure that the camera turns when I move the mouse to look in a certain direction. To do this, you can calculate a new LookAt matrix based on the offset of the positions of mouseX and mouseY from their positions in the previous frame to find out how much to rotate the camera in each direction (although I’m only doing pitch and yaw for now). Once these offsets have been calculated, the camera direction can be updated:
var direction mgl32.Vec3
direction[0] = float32(math.Cos(float64(mgl32.DegToRad(yaw))) * math.Cos(float64(mgl32.DegToRad(pitch))))
direction[1] = float32(math.Sin(float64(mgl32.DegToRad(pitch))))
direction[2] = float32(math.Sin(float64(mgl32.DegToRad(yaw))) * math.Cos(float64(mgl32.DegToRad(pitch))))
cameraFront = direction.Normalize()
With this in place, the camera should now be able to fly around the scene and look wherever the cursor is pointing:
Conclusion
I think I made a lot of progress this week, especially in terms of understanding OpenGL. In terms of performance, I have no idea how this thing does but it seems to run well on my laptop so no real worries there. The next step for the engine involves lighting which I’ve never done in computer science before.
Another small thing is that I’m now taking a 3D Computer Graphics course in school, but it’s not really related to low level graphics which was a bit disappointing. Howerver, the course relies heavily on Pixar’s Renderman software, which is something I’ve always wanted to have access to. I think the class will help me work with some of the higher level concepts of graphics without actually building any of the tech myself at the systems level.
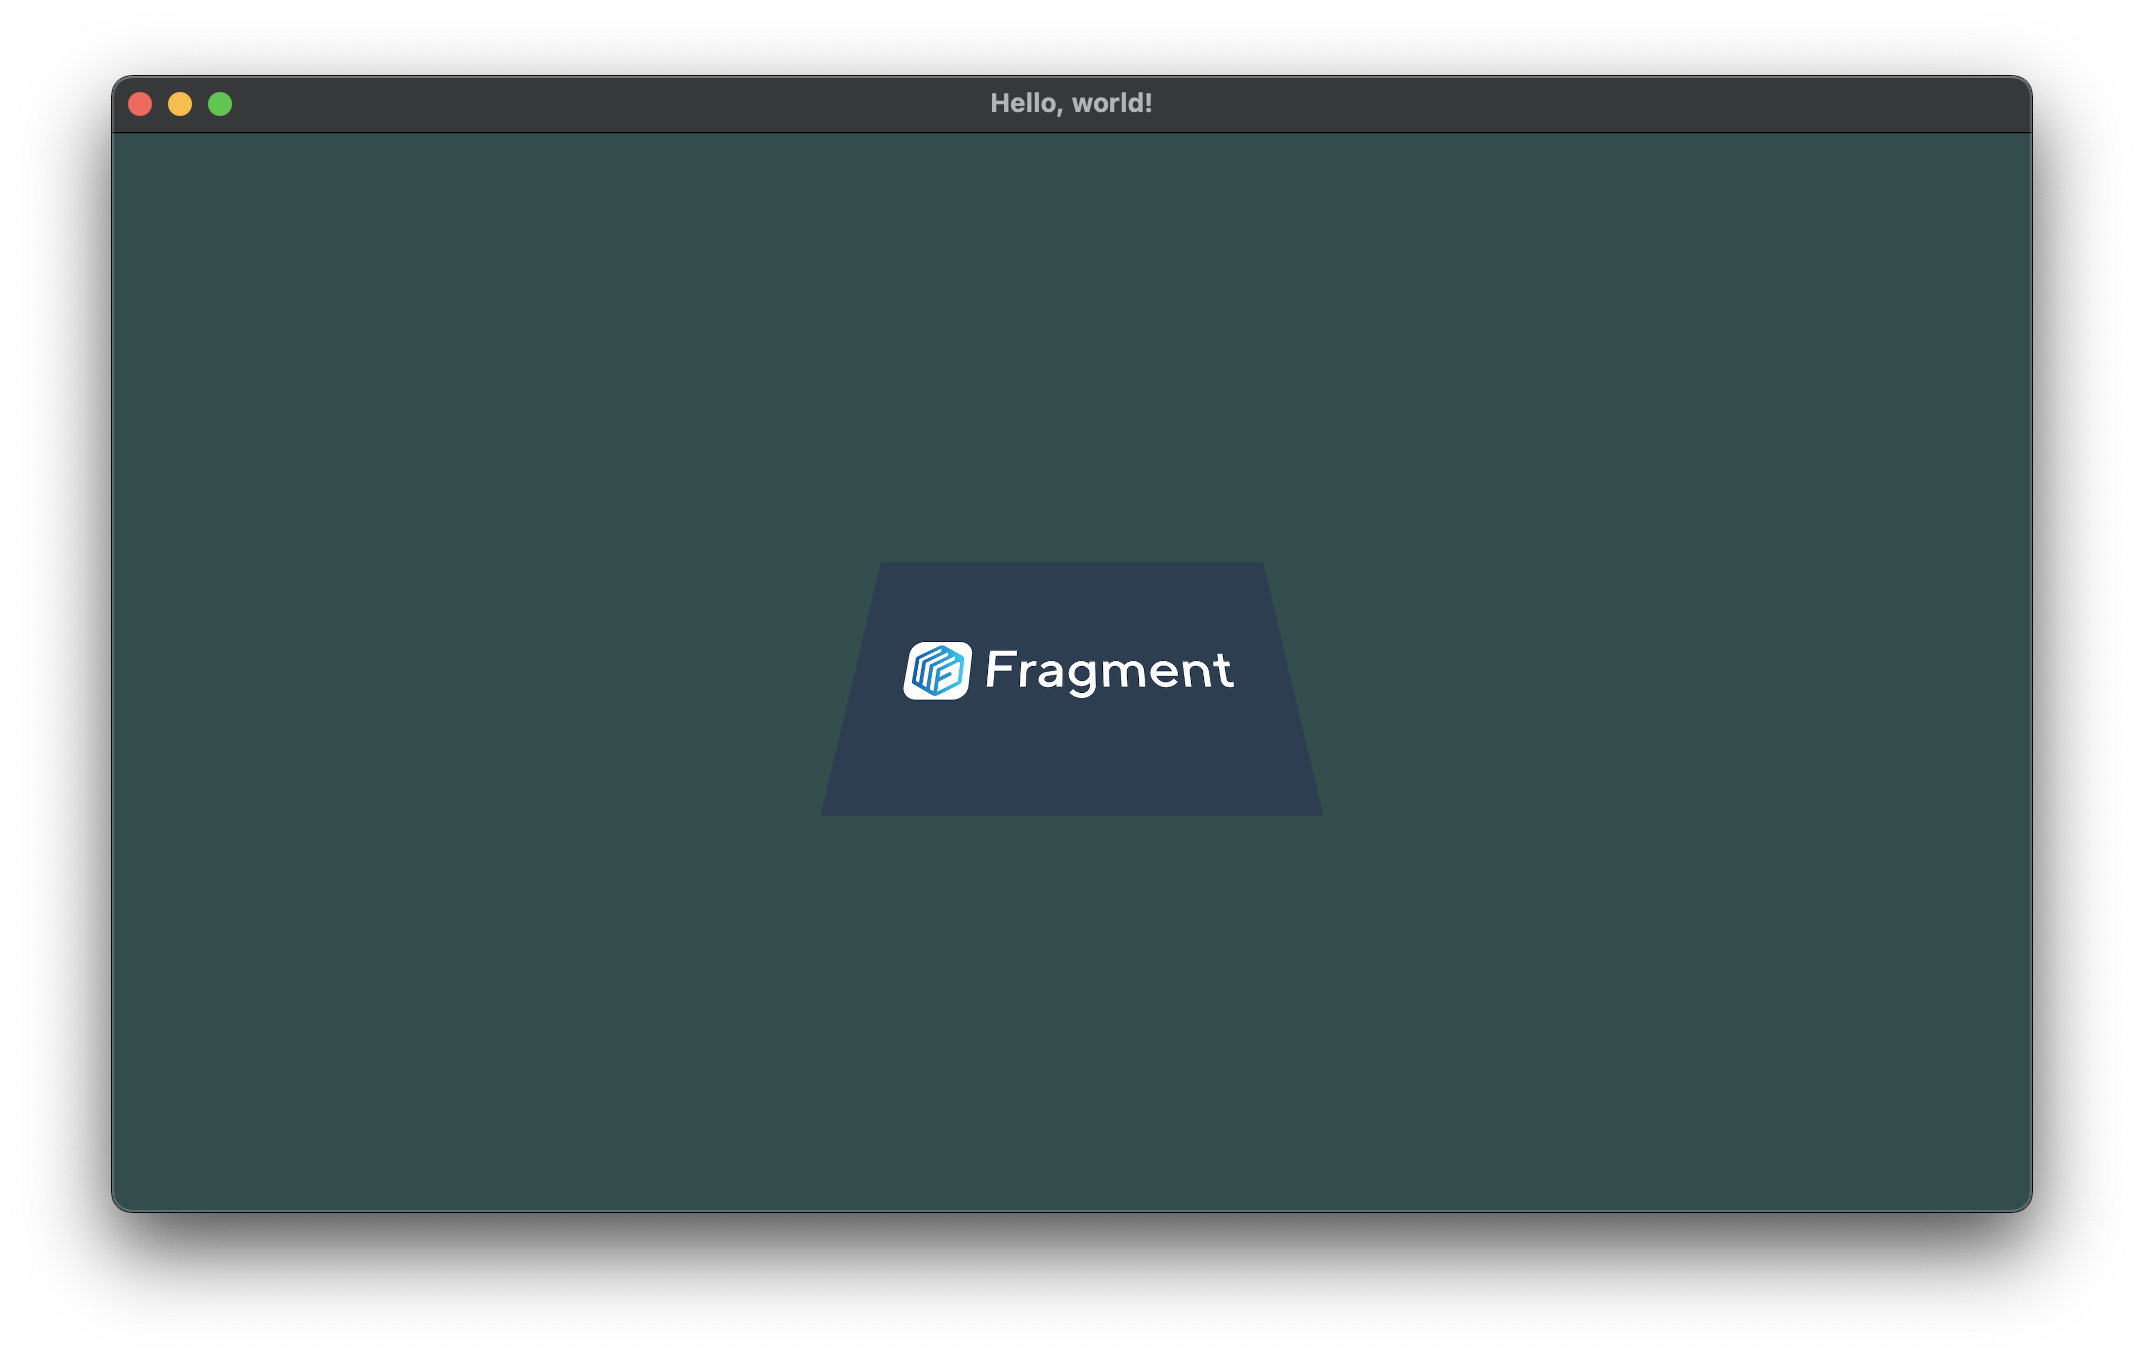
Also drew up a mascot logo for when I finally abstract a full engine out of the codebase. My digital ark skills still need to improve if I’m getting into games but this is the best I can do for now (it’s not really important at this stage). Most likely calling it mango but not fully set on the name just yet:

You can follow the development of the engine here.